OpenSCAD User Manual/The OpenSCAD User Interface
User Interface
The User Interface (UI) has the usual menus along the top of the Window; File, Edit, View, Window, and Help to which is added the Design Menu.
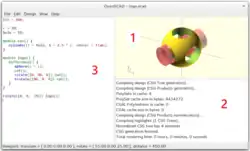
The application starts with three sections, or panes, showing in the window:
- The Model Viewing Pane
- The Console Pane
- A Text Editor Tab
The rest of the sections in the UI may be shown by enabling them using the Window Menu.
Note: In the following sections menu items that have hot keys defined show the key press in parentheses, as in Design > Preview (F5)
Window Panes Common Features

Each pane of the UI may be moved, extracted to its own window, and closed using the icons on the pane's header.
Click and Drag in the header bar to move a pane to any edge of the window and it will dock to that side, if there is already another pane docked there the one being dragged will become a tabbed window with the existing one.
Clicking the double window icon makes the pane into a separate window and the X icon, of course, closes it.
Model Viewing Pane
The model generated by the script is previewed in the viewing area and, optionally, will be automatically updated with each change in the script. This pane is actually the main window for the application so it has the menu bar permanently and the other panes dock at its edges.
The preview may be manually refreshed using menu Design > Preview (F5). To see the fully rendered model Design > Render (F6) may be used.

The View menu has several options for showing or hiding features of the Viewing Pane. For example, the Show Axes (Ctrl+2) menu item shows an indicator for the coordinate axes can be enabled.
More information about the Model View Icon-bar functions is available.
Navigation
The view of the model is manipulated using the mouse and specific keys:
| Action | Operation | Description |
|---|---|---|
| Centre of Rotation | double Left Click | click on an axis line, or the surface of a model to set |
| Ctrl|[3} | Show Crosshair | |
| rotating the view | Left Click and Drag | up and down tilts the view up and down. |
| Side to side spins the view around the Z-axis. | ||
| Left Double-click | to set the centre of rotation. | |
| Shift + Left Click and Drag | side to side rotates the view around an axis from the origin to the view point. | |
| Up and down work as Left Click an Drag | ||
| moving the viewing area | Right Click and Drag | moves the viewing area, left, right, up, and down |
| zooming | Rolling the the mouse wheel | (if available) |
| Shift+ Middle Click and Drag | up and down zooms | |
| Shift+ Right Click and Drag | up and down zooms | |
| Plus and Minus keys + and - | ||
| Square Brackets Ctrl+[ and Ctrl+] | ||
| Reset Rotation | Ctrl+0 | short cut to menu View > Diagonal |
| Reset All | Ctrl+⇧ Shift+0 | short cut to menu View > Center |
Console Output Pane
This pane is where status information about graphics processing, and feedback messages from a running script are displayed.
During rendering a progress-bar is displayed at the bottom of the console, along with a button to cancel it.

Text Editor Tabs
Each open script file is shown in its own tab in the text editor pane.
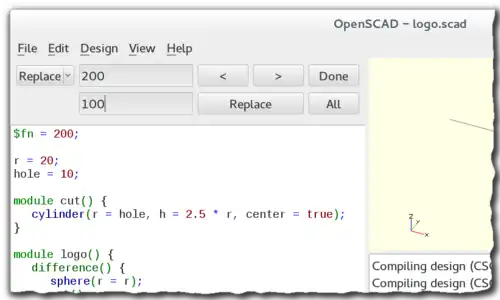
It has the standard features:
- text search & replace
- syntax highlighting
- comment/ un-comment lines of text
- file reload to revert all edits in a session
- color schemes (selected in Preferences)
- code/text snippet insertion (templates)
- font size control
- interactive number modifications
Editor Templates
The editor has a facility for pasting in blocks of text or snippets of code to assist when writing code. These text items are called Templates and are inserted into the script at the cursor position. Right Mouse click to see the context action menu, select the Insert Template item, and then double click template you want.
Templates are simple JSON files with a single top level definition. For example, a template for if-then-else could be:
{
   "key" : "if-then-else",
   "content" : "if(^~^) \n\t;\nelse\n\t;"
}
Note the special symbol, "^~^", in the template. That marks where to leave the text cursor after it is pasted in. This is what it will look like:
if()
  ;
else
  ;
with the text cursor between the parentheses, just after "if", ready to put in the conditional expression.
Using and creating templates is covered in more dept on the UI Advanced Features page
Font Size Control
When hovering over an editor tab, or floating window, rolling the mouse wheel, while holding the Control Key down, will increase, or decrease the font size, effectively zooming in an out.
Zooming in and out in the Model View Pane is done the same way.
Interactive Number Modifications
When the cursor to the right of a digit in a number it can be incremented or decremented using the arrow keys or by rolling the mouse wheel.
- right adjacent to a digit
- Alt+Down Arrow decrement
- Alt+Up Arrow increment
The left and right arrows also have a role in interactive change
- left of a number
- Alt+Left Arrow to add digits to the left
- right of a number
- Alt+RightArrow will add a decimal point and one fraction digit per tap
Further details on Interactive Modification are covered on the Advanced Page
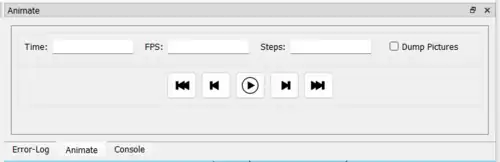
Animation Control Pane
The Animate option adds an animation bar to the lower edge of the screen. As soon as FPS and Steps are set (reasonable values to begin with are 10 and 100, respectively), the current Time is incremented by 1/Steps, FPS times per second, until it reaches 1, when it wraps back to 0.
Every time Time is changed, the program is re-evaluated with the variable $t set to the current time. Read more about how $t is used in section Other_Language_Features.
A more complete description of Animation is on the Advanced UI page
The Rest of the UI Elements
- Fonts List Pane
- Customizer Pane
- Viewport Control